Creating and responding to tickets
[Desktop]
The tawk.to ticketing system allows you to process and respond to customer requests and issues via email.
The ticketing system is an essential part of your customer service toolkit. It enables your team members to follow-up after chats, escalate concerns to senior team members and departments, respond to missed messages and create new help tickets from scratch.
You can even forward all your support emails to the tawk.to dashboard, so it’s easier to manage your emails and no query gets missed.
Learn how to forward your support emails to your tawk.to dashboard in this article: Forwarding your emails to tawk.to
NOTE: The instructions below can be completed from a browser or the tawk.to desktop apps.
If you have multiple properties, check to make sure you're viewing the correct one. Hover over the current property name in the upper-left menu to select a new property from the list.

How ticketing works
When a team member creates a ticket, three things happen:
- A ticket is created in the Inbox area of the property
- The customer receives the message as a ticket via email
- The assignee or department members receive a copy of the ticket by email
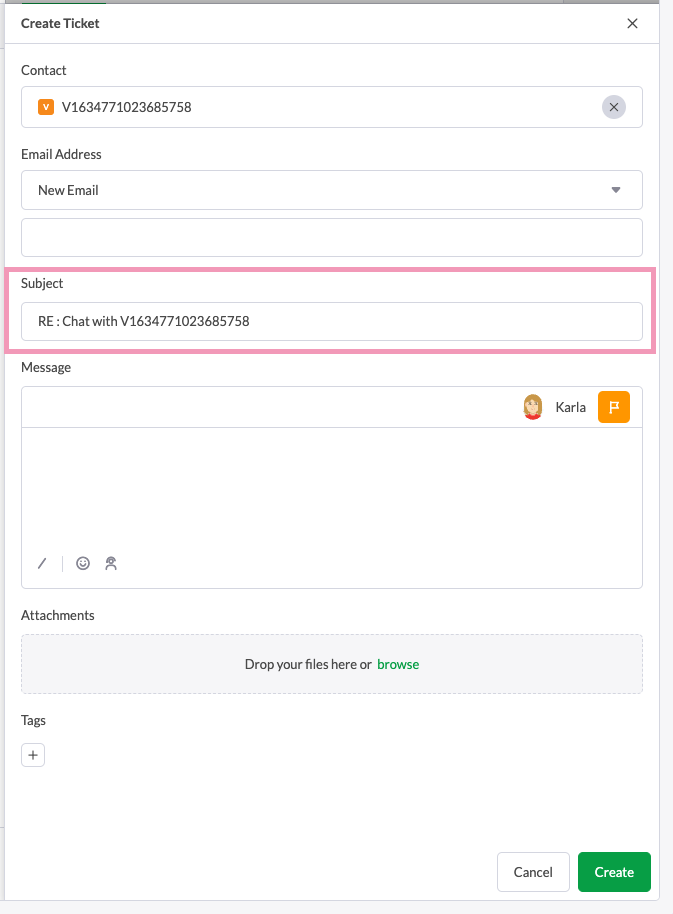
Subject Line: This text appears as the subject line in the email received by the customer and your team.
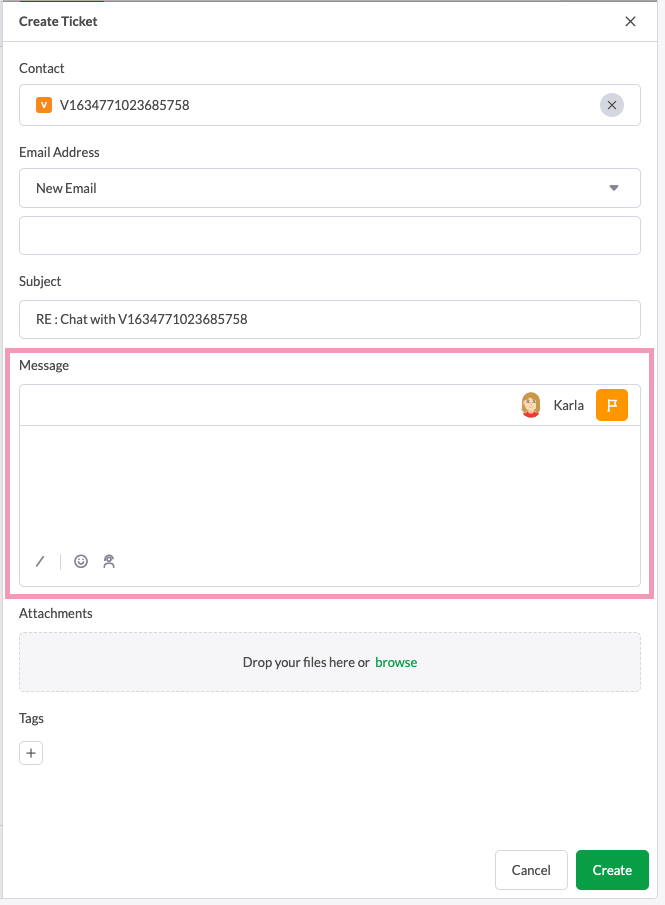
Message: The message that appears in the body of the email. Your message should be concise and also contain all the relevant details. Remember, the visitor will receive a copy of the ticket, including any messages and files you add.
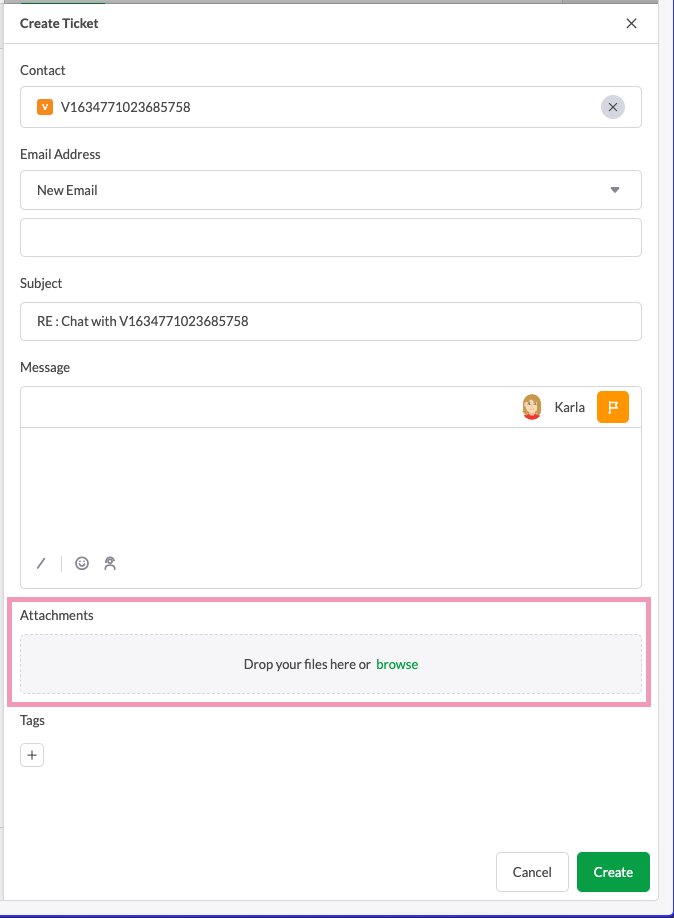
Add Attachment: The attachment feature allows you to upload files and attach them to the ticket.
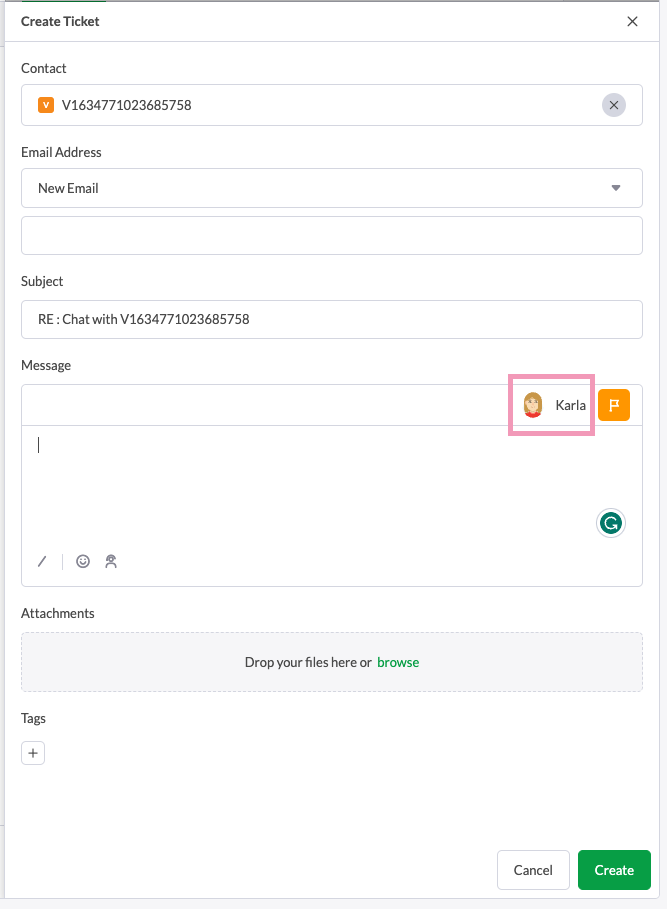
Assign To: You will need to assign the ticket to a property member or a department. When creating a ticket, it is assigned to you by default.
When responding and managing tickets in the dashboard, you can filter tickets by assignee or department in the Inbox section. Even when a ticket is assigned to another person or department, any team member can respond via the tawk.to dashboard.
Learn more about creating and managing departments here: Creating and managing departments
Priority: You’ll have the option to set each ticket’s priority to Lowest, Low, Medium, High, or Highest. You can filter tickets by priority in the Inbox section.
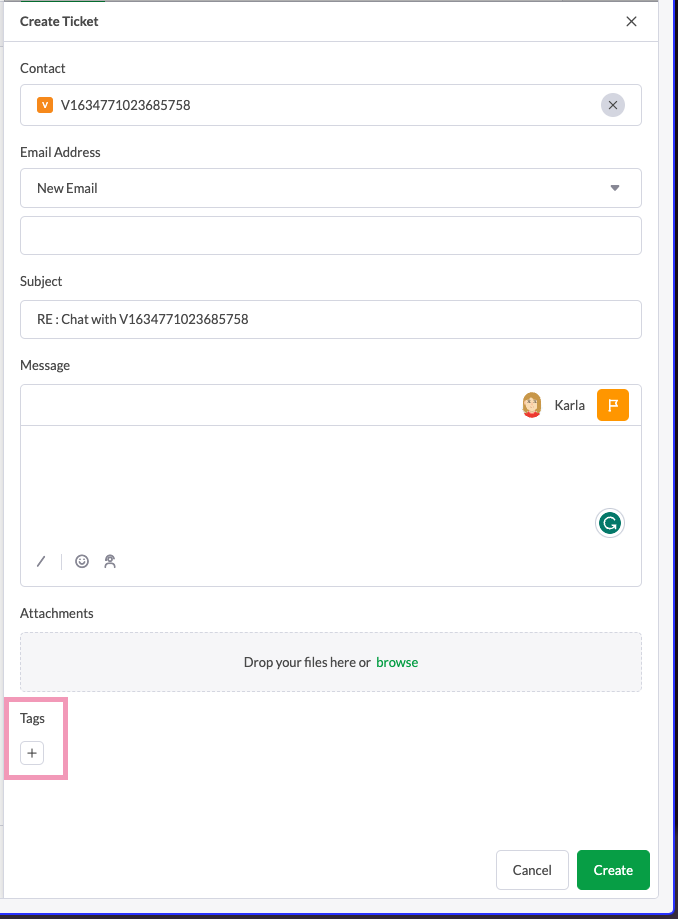
Tags: You can tag the ticket with a keyword. This allows you to filter your tickets by keywords in the Inbox area.
Now that you know how ticketing works, let’s look at four ways you can support your customers with ticketing at tawk.to:
- Creating a ticket during a chat
- Responding to a missed chat or offline message
- Responding to an existing ticket
- Creating a new ticket from scratch
Creating a ticket during a live chat
Creating a ticket during a chat allows you to do the following:
- Follow up with the customer at a later stage
- Escalate their query or issue to another person or department
- Send them details via email
- Make it easy for them to contact you via email
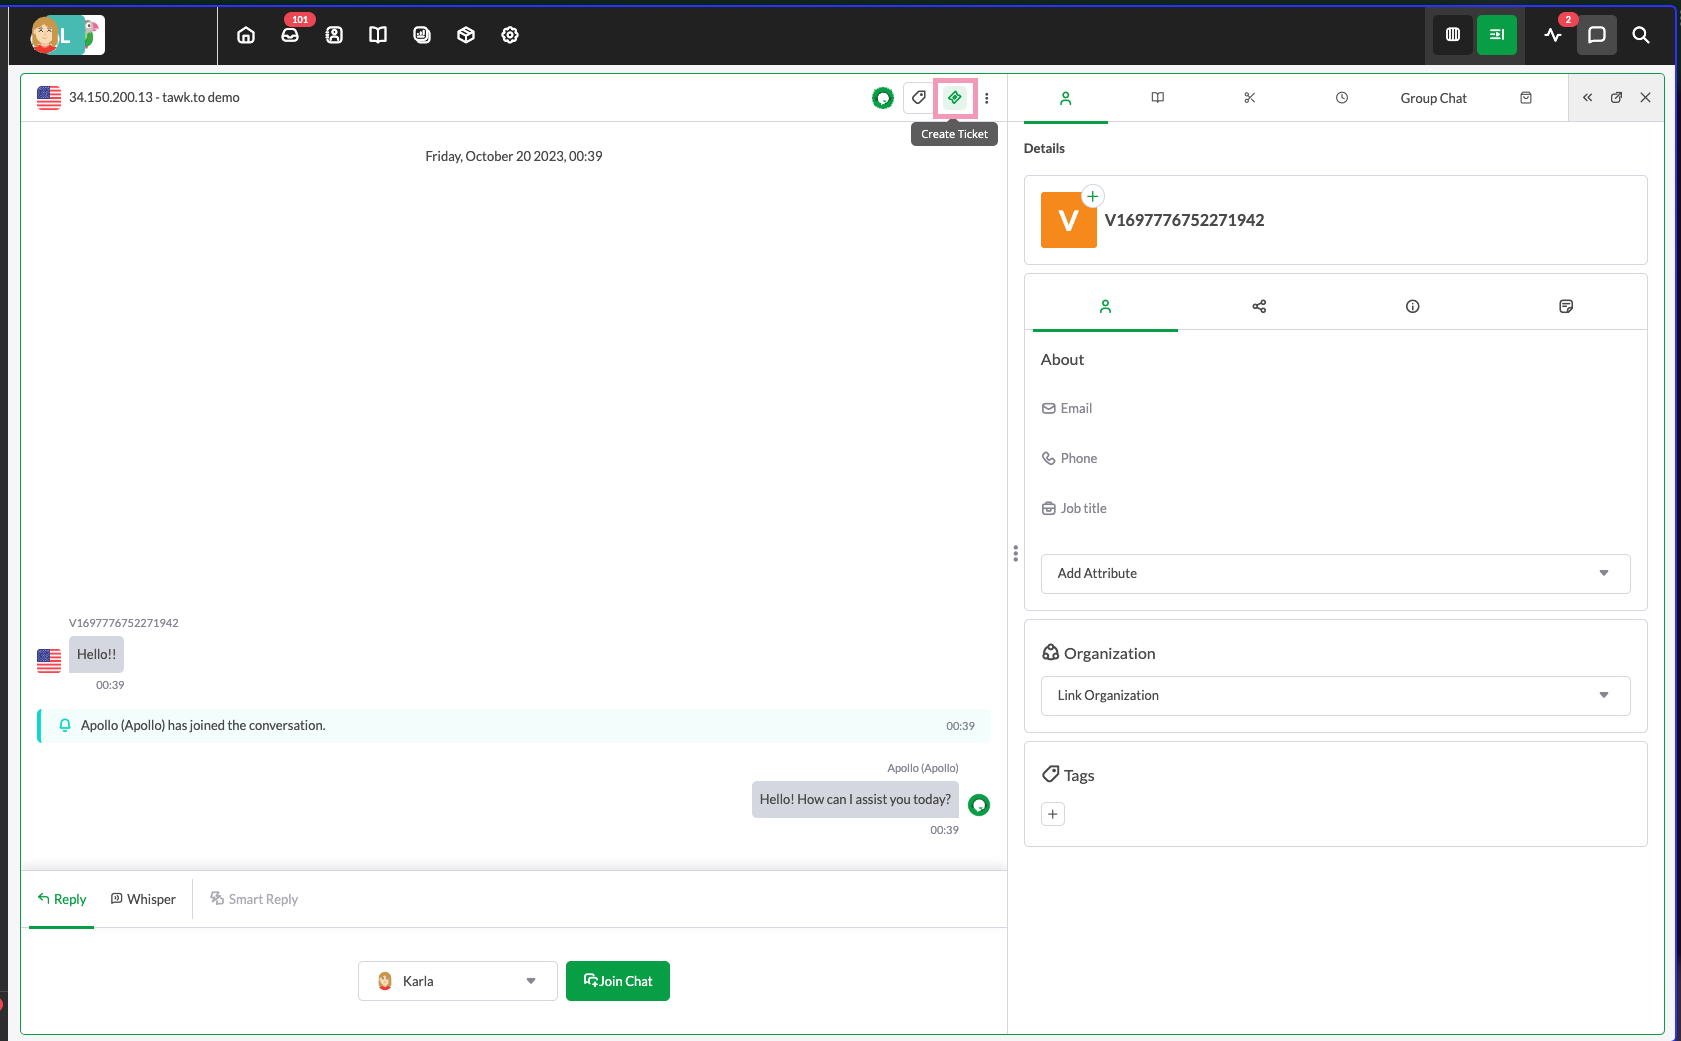
While chatting with a visitor, you can create a ticket by clicking the Ticket icon in the lower-right corner of the chat header.
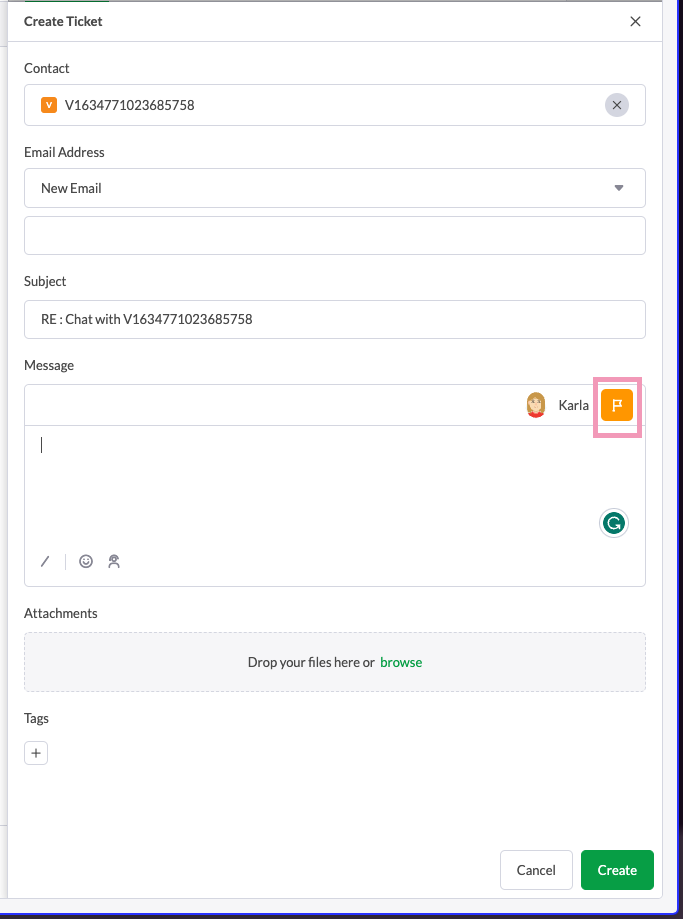
Add your message in the text box. Then, assign the ticket, set a priority and add a tag as needed.
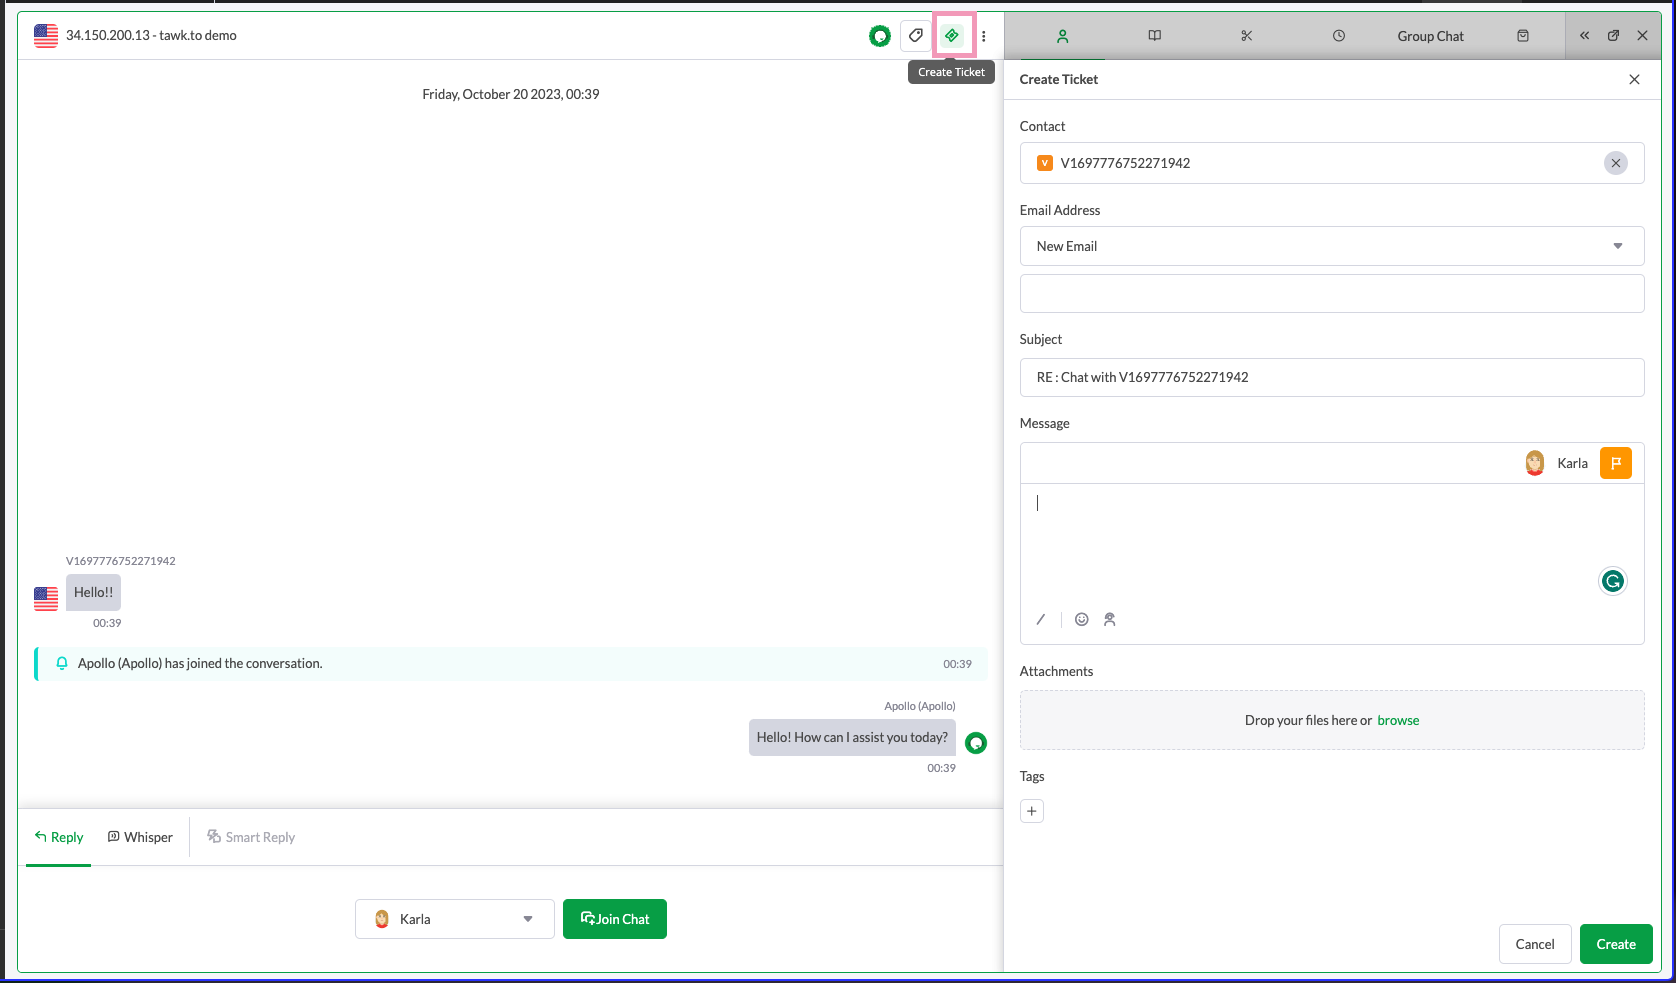
Add your message in the text box. Then, assign the ticket, set a priority and add a tag as needed.
If you haven’t captured or added the visitor’s name and email in the information tab, you will need to enter these details before creating a ticket.
Even if the visitor has entered their email address in a Pre-Chat Form, it’s a good idea to confirm it is correct and the best email address to use.
For example, you might ask: “Can I confirm that support@tawk.to is the best email address to use for contacting you?”
Once done, you can close the ticket by selecting Close or the X button in the upper right-hand corner.

Replying to missed chats
One question people often ask is, “If I miss a chat or someone has left me an online message, how can I reply?”
Ticketing allows you to respond to a visitor who has left their contact details in a Pre-Chat Form (if you have set up a Chat Rescue Trigger), or when your widget is in Offline mode.
When your widget is in offline mode, it will automatically request details from any visitor leaving a message.
Learn more about using the Pre-Chat form here: Using the Pre-Chat Form
If you have set up a Pre-Chat Form, each of your visitors will be asked to leave their name, email and any other information your form requires before beginning a chat (the catch is that this can reduce the number of incoming chats you receive).
By setting up a Chat Rescue Trigger, you can send a message encouraging visitors to leave their details in the event that an agent is not able to respond promptly to a chat request.
For example, you might write something like the following:
“Thanks for your patience. We shouldn’t be too much longer. If you can’t wait, please leave your name and contact details, and we’ll get back to you shortly.”
You can learn more about setting up a Chat Rescue Trigger in this article: Setting up a Basic - Chat Rescue Trigger
When your widget is Offline, a form will automatically request details from any visitor leaving a message.
To get started, log in to your tawk.to account and select the Inbox icon in the upper tab menu.

On the left side of the Inbox area, you will see a menu panel containing four menu options: Chats, Tickets, Trash, and Spam. Selecting All will display all Chats and Tickets.

You will be able to see a list of all past chats on your property, along with notifications showing the status of each chat.
To find any missed messages, filter the chats by Status. Click the drop-down arrow in the Status column and select Open.

Click a message to open it in the chat. Then head down to the bottom of the page and click the green Create Ticket button.
Remember, you will need to have the visitor’s name and email address to convert the message to a ticket. If the customer has filled out a Pre-Chat Form, this should have been automatically populated. If not, and the visitor has left their details in a message, manually enter these in the required fields.

To respond to a pre-existing ticket, make your way to the Inbox area and select the Tickets tab.

Select a ticket in the list and add your response to the text field at the bottom of the screen.
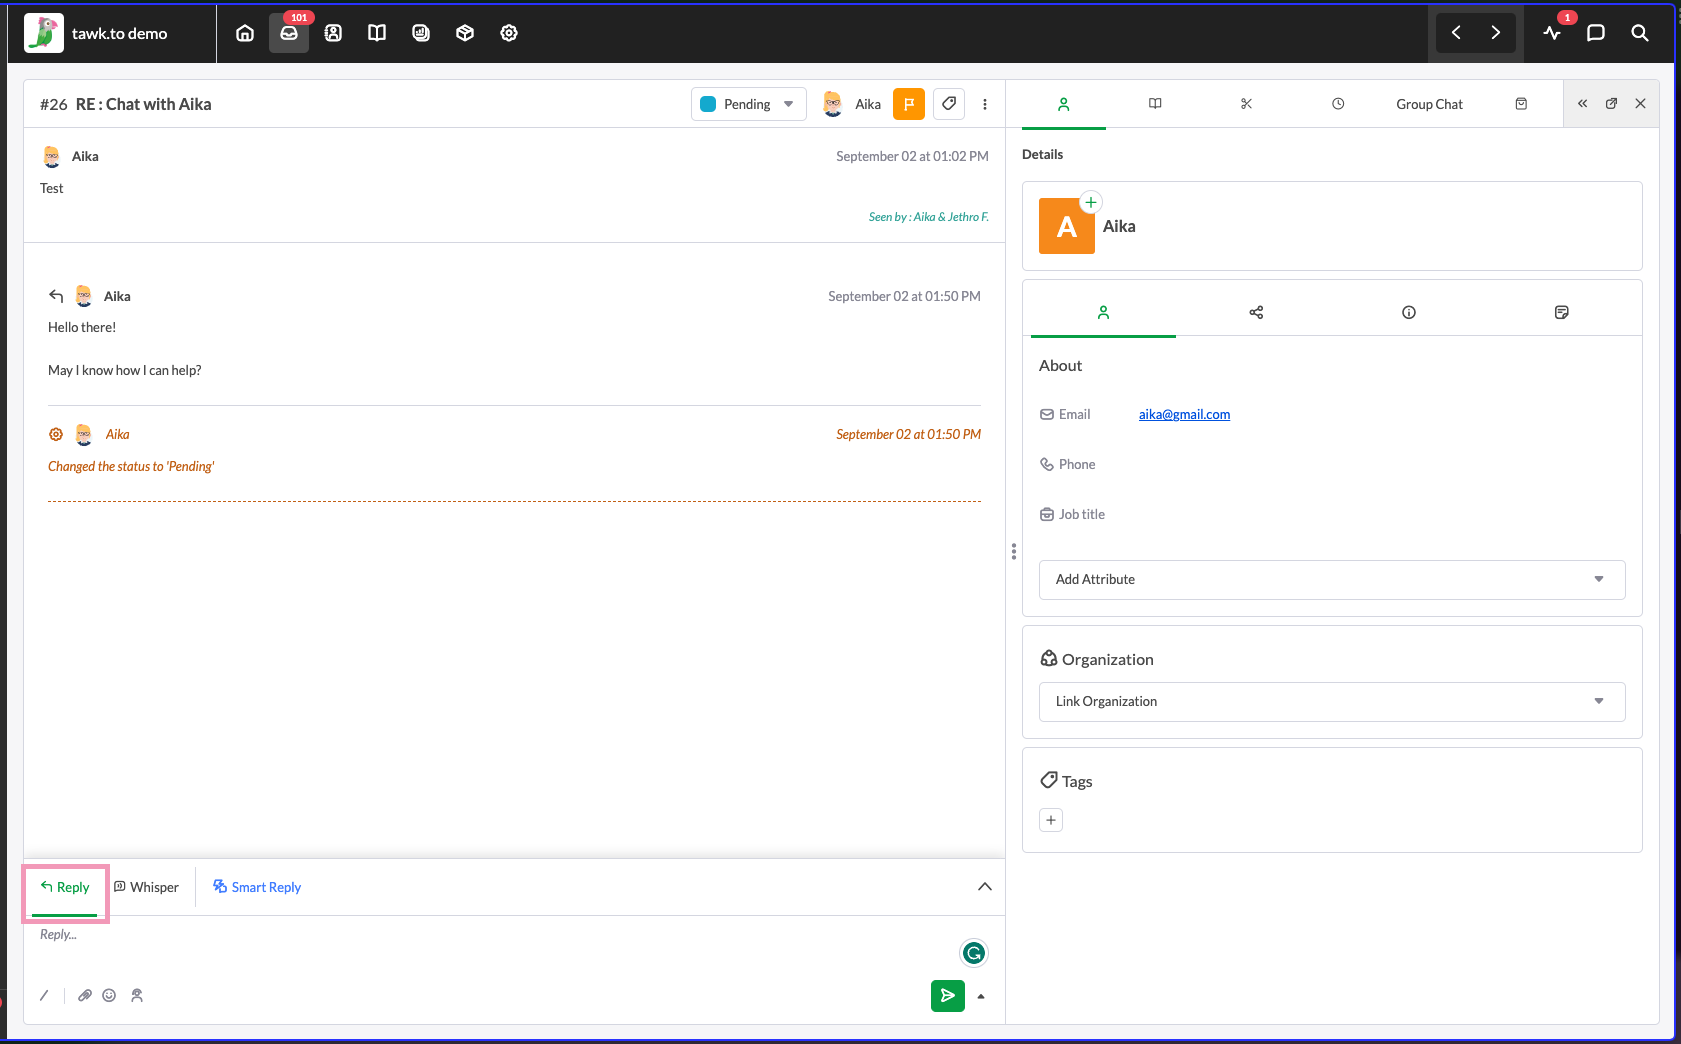
Both agents and the recipient can reply to the ticket thread via email.
When replying, it’s important to continue using the "to" address in the ticket forwarding email. Otherwise, if you reply to the customer's direct email, the email chain will be broken, and the thread will not be synced in the Inbox.
When replying to the ticket forwarding address, responses will be synced in your Inbox and forwarded by email to all parties involved except the sender.
You can also respond to the ticket by replying to the email received when creating the ticket or the email you receive when the customer responds to the initial ticket.
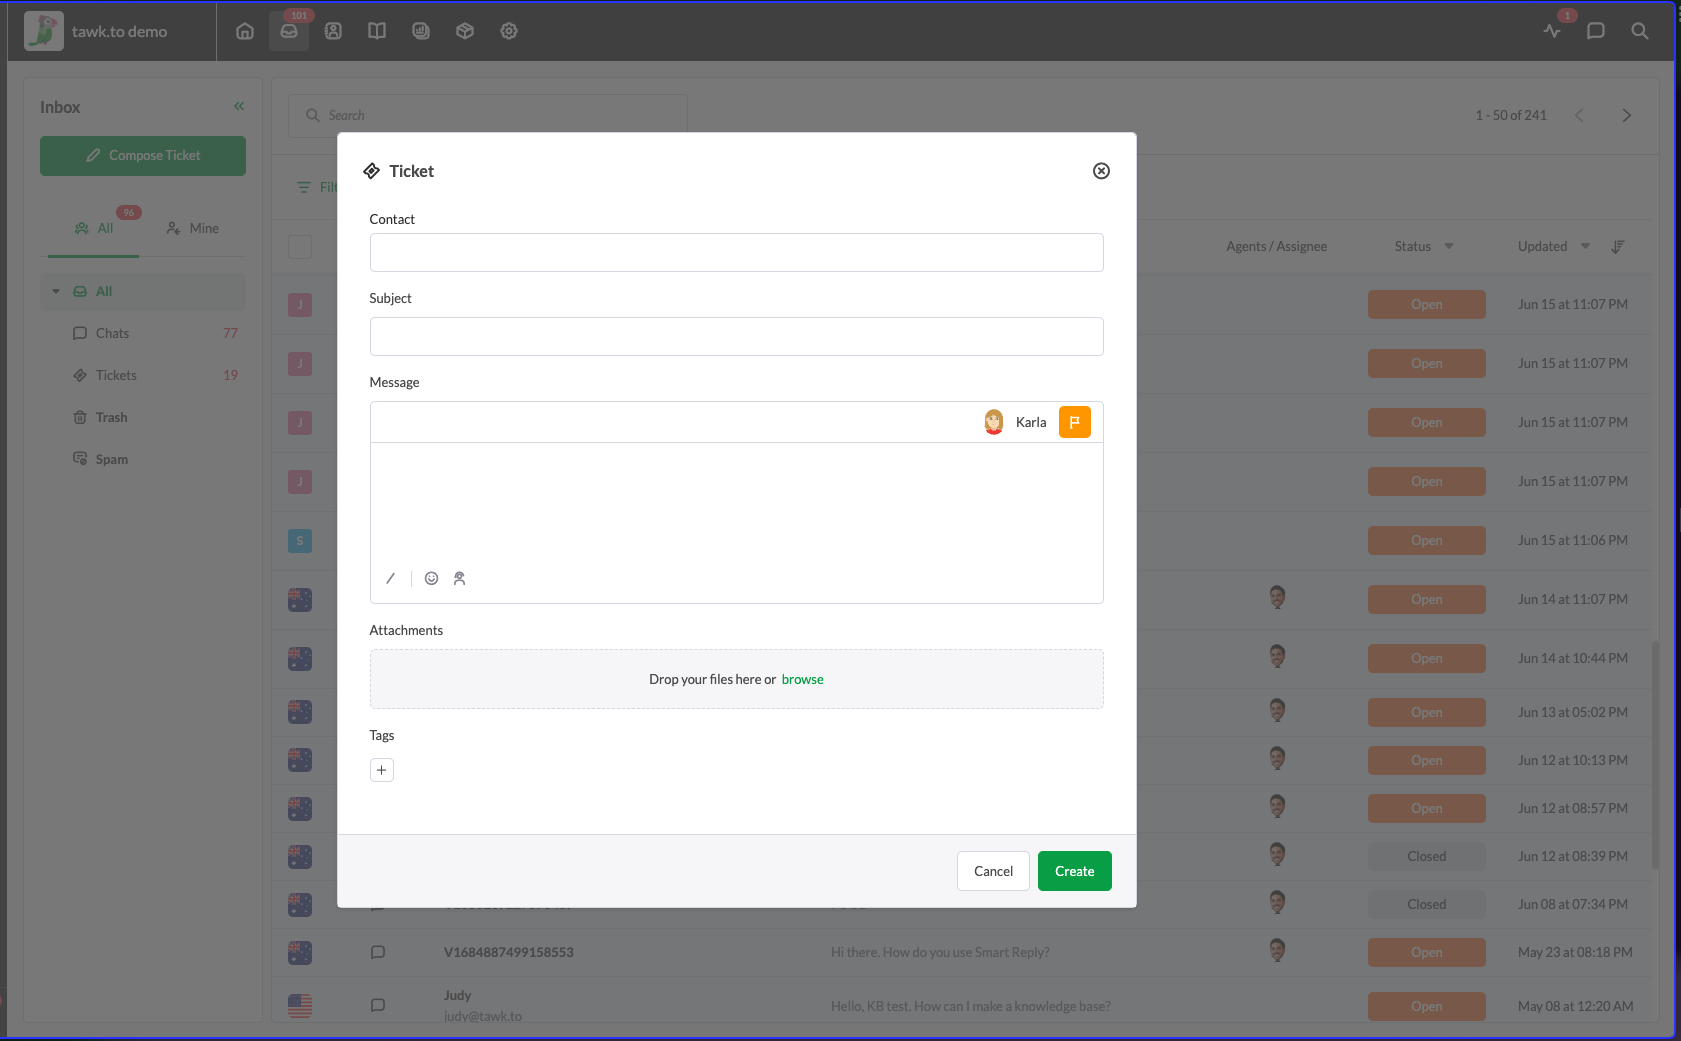
Creating a new ticket
You can also create a new ticket from scratch.
Head to your Inbox and click the Compose Ticket in the upper-left corner of the screen.
A form will appear, allowing you to create a new ticket. Enter the recipient’s name, email, the subject of the ticket and a message. Then, assign the ticket to yourself or a member of your team.
You also have options to assign a priority level, add a tag and/or include an attachment. When you’re done filling out the form, click the green Create button and you’re done.
How to forward messages from your email account to the tawk.to Dashboard
It’s easy to forward your ticketing messages from your email system to tawk.to and keep all your conversations in one place.
Make your way to the ⚙️Administration panel by selecting the gear icon in the upper tab menu. Then, select your property and make your way to the Overview panel.

Copy the address in the Ticket Forwarding Email section on the right of the panel and forward all of your support emails to that address. That way, when someone emails you, the message will also show up in your Inbox as a ticket.

You can view your conversation history with each contact, including chat messages, tickets, and support emails, by selecting the Contacts icon in the upper tab menu.

You’ll have an option to view it by Timeline, Notes, Chats, and Tickets.

If you want to learn more about inbox, read this article: Getting started with the Inbox
Need more help? Reach out to our support team or schedule a call.